
Home Theater Design: Room Layout Principles That Matter
The home theater design principles that decide how a room actually looks and sounds: shape, light control, wiring, and finish choices.
Contents10
- Light control comes first
- Plan wiring before the walls are finished
- Flooring: a real acoustic choice, not just a look
- Layout: work outward from the screen and seats
- Dedicated room vs. shared space
- Acoustic treatment as a design element, not an afterthought
- Equipment placement and cable management
- Common design mistakes
- Check the home theater design with a measured overlay
- A design choice worked from the image boundary
Home theater design brings light, seats and image, plus wiring into one plan. Decide those before finishes or large purchases. Check the real room and source devices. Equipment alone cannot establish a workable layout.
Light control comes first
Check light before paint and flooring. Review these room paths:
- Windows. Blackout curtains or cellular shades matter most in a projector-based room, where even modest ambient light noticeably reduces contrast. A TV-based room, with its brighter self-lit panel, is more forgiving of some ambient light, though it still benefits from control over direct glare and reflections.
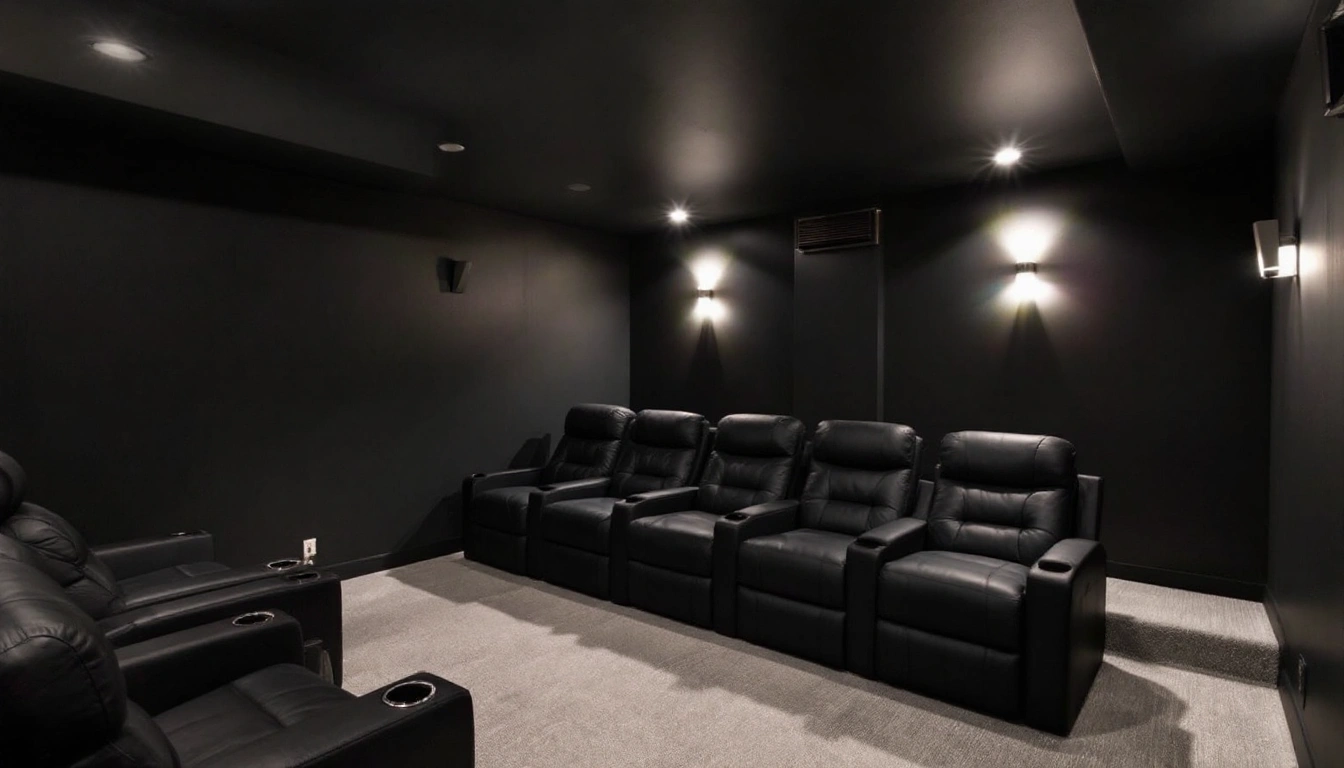
- Wall and ceiling color. Darker, matte finishes absorb more stray light instead of bouncing it back toward the screen, which improves perceived contrast; especially important with a projector, less so but still relevant with a TV. A very dark neutral, rather than pure black, gets most of the benefit while looking less severe as an everyday room.
- Fixtures and finishes. Glossy paint, shiny floor tile, and reflective decor near the screen all bounce more stray light around than matte equivalents. It's a small effect per surface, but it adds up in a room built around picture quality.
Plan wiring before the walls are finished
If walls are open, plan these routes before closing them. Quote the actual work rather than claiming a fixed saving:
- Speaker wiring, run in-wall or in-ceiling, avoids visible cable runs across the floor or up the walls and lets speakers sit in acoustically ideal positions rather than wherever a visible cable happens to reach.
- Power outlets, placed where the receiver and projector, plus any powered speakers will actually sit, save you from extension cords and power strips crossing the room later.
- Low-voltage runs for network or control wiring, if you're planning any smart-home or automated control integration, are far easier to route before drywall goes up than after.
For a finished room, compare safe surface routes and supported wireless options. Power cords still need a plan. Use the setup guide to check the remaining connections.
Flooring: a real acoustic choice, not just a look
Check the floor with the room's sound and daily use in mind. Rugs and soft furnishings can absorb some reflections. They do not establish bass isolation through the floor. Hard surfaces may need a different treatment plan. Compare cleaning and access needs too, without making medical claims about a material.
Layout: work outward from the screen and seats
Use the measured room to set this layout order:
- Screen or TV position, set by the room's shape and where the seating row will realistically go.
- Seating position, set by viewing distance from that screen; see best viewing distance from a TV or screen for how that math works.
- Speaker positions, set relative to both the screen and the seating row once those are fixed.
- Everything else; storage, decor, secondary lighting; fills in around those three anchors rather than dictating them.
Check the existing sofa against the whole plan. It may be the right seat, but its position still needs a screen and speaker check. Do not assume fixed furniture makes those decisions unnecessary.
Dedicated room vs. shared space
A dedicated room can keep its seats and image position. A shared room needs a daytime plan too. Check storage, window access and normal walkways. Curtains that open easily may suit it better than a permanently covered window. Choose finishes for actual room use, not only a dark-room photograph.
Acoustic treatment as a design element, not an afterthought
Assess reflections after the main surfaces and furniture are known. Use treatment data to choose materials and positions. Do not fill a wall with panels solely for appearance. The panel guide separates absorption from sound isolation. A furnished bookcase is not a measured substitute for every panel.
Equipment placement and cable management
Choose the gear location with its heat and service needs in mind. Check the exact vent clearances and cable bends. A closed cabinet may need a heat plan. An open shelf still needs safe fixing and access. Route the signal and power correctly instead of choosing only by the nearest outlet.
Common design mistakes
- Choosing paint and decor before deciding on light control. A bright, glossy, light-colored room fights against picture quality regardless of how good the gear is.
- Leaving wiring as an afterthought during a renovation. Retrofitting in-wall wiring after drywall and paint are finished is far more disruptive than planning it during construction.
- Designing the room around furniture placement instead of screen and seating distance. This tends to produce a room that looks fine in photos but doesn't actually deliver a great viewing experience from the seats people use most.
Check basement design for ceiling and moisture constraints. Compare room ideas for different uses. Keep the work in the cost plan so design changes remain part of the quote.
Check the home theater design with a measured overlay
Draw the image and frame, plus center speaker on the screen wall. Keep their dimensions separate. Add the seats in their fully reclined position on the floor plan. Mark each door swing. This exposes conflicts before finishes make changes harder.
For a 120-inch 16:9 image, the visible area is about 104.6 by 58.8 inches. That is calculated rectangle geometry. It does not include the frame or establish a safe mounting height. Add the actual frame size and check the image from the real seats.
Now add the receiver or bar and the source cable route. Include plug depth and vents, plus service access. Do not assign a cabinet location only because it hides equipment. The exact model's clearance instructions still apply.
Review the drawing in daytime and viewing mode. Confirm windows and storage, plus exits remain usable. A design that works only in an empty room needs revision. Use the setup guide to keep those decisions in order.
A design choice worked from the image boundary
Suppose you want a 120-inch 16:9 image. This is a planning example, not a room we have built. The visible area is about 104.6 inches wide and 58.8 inches high. Tape that outline on the wall and mark the actual frame outside it.
Next add the center speaker and cabinet below. Open the nearby door and check whether either blocks its swing. Check the image from each seat with the recliners extended. If the frame or cabinet conflicts with access, change the design before choosing finishes.
For projection, put the lens location on the same drawing. Measure to the image plane, not just the wall. Compare that distance with the exact model's throw range at this image width. Wall fit and lens fit are two separate answers.
Now record the possible changes. A smaller image changes the wall and throw checks. Moving seats changes their viewing angles. Moving a door or building a platform is a different scope of work with safety and cost checks. Do not label all three as a simple projector adjustment.
This method makes the design decision reviewable. It does not certify comfort, safe fixing or the building's electrical capacity. Keep those checks alongside the drawing rather than hiding them in a vague ready-to-install label.
Questions people also ask
What's the single design choice that affects picture quality the most?
Light control; wall and ceiling color, window treatment, and even flooring finish all affect how much stray light bounces around the room and washes out contrast, especially for a projector. This matters more than most furniture or decor choices.
Do I need to paint the walls black for a good home theater?
No. Dark, matte colors help, but a very dark neutral like charcoal or deep gray gets most of the benefit without committing to full black, and looks less severe in a room that isn't used exclusively for movies in the dark.
Should I plan wiring before or after finishing the room?
Before, whenever possible. Running speaker wire, power, and any in-wall or in-ceiling cable behind drywall avoids visible conduit and cable clutter later, and it's far easier to do before walls are finished than to retrofit afterward.